Add Two Numbers: Web Application
This tutorial describes a very simple web application that adds two numbers together and displays the result. The calculation is implemented by a three-node workflow. No data objects are needed—we aren't going to read or store any data.
Before creating the web application you must create the workflow, see: Add Two Numbers: Workflow
The web application is described in this topic and comprises the following controls:
- Two number boxes to accept the numbers to be added and passed to the input of the workflow.
- A button to action the calculation by triggering the workflow.
- A number box to display the result returned from the workflow.
Creating a new web app
Create a new web application; the minimum requirements you need to enter in the New Web Application page are Application Name, Display Name, and Description.
For help see: Creating a New Web Application.
Creating a start page
- Select the new web application in the Web Applications navigation list.
- In the Web Application Versions table, select the version (1) and click the Edit button above the table.
- The empty Forms table is displayed showing that no pages have been created yet.
- Click Create, and type a name for the new page; for example, Homepage.
- Click Is Start Page.
The new page appears in the Forms list. 
Adding content to the start page
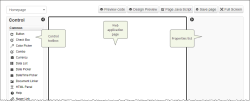
Select the new page and click Edit. The page designer opens:
The Control toolbox is divided into Common, Component and Layout sections.
Drag the following items in order from the Control toolbox and drop them on the web application page starting at the top of the page:
- Common > Number Box To input the first number.
- Layout > Space Divider Some white space.
- Common > Number Box To input the second number.
- Layout > Space Divider Some white space.
- Common > Button To trigger the workflow.
- Layout > Space Divider Some white space.
- Common > Number Box To show the output.
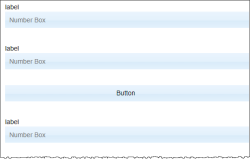
The page should show four controls with spaces between them:
Configuring controls
When controls are added to a page, they are assigned a unique system name, and a default label or text that provides the name; some controls also have a placeholder field. In this section we change the default control properties to suit the application, particularly the default system names to make the controls easier to identify.
When you select one of the controls on the page, it's properties are selected in the Properties list to the right.
Number boxes
Select the first input Number Box and set the properties below.
- System > Name: Num1
- Appearance > Placeholder: empty
- Appearance > Label > Default Value: First number
Select the second input Number Box and set the properties below.
- System > Name:Num2
- Appearance > Placeholder: empty
- Appearance > Label > Default Value: Second number
Select the output Number Box and set the properties below.
- System > Name:Num3
- Appearance > Placeholder: empty
- Appearance > Label > Default Value: Total
Button
Select the Button and set the properties below. When you specify the workflow that was created in the previous topic, the input and output parameter requirements are read from the workflow—in this case two input and one output. You assign the two workflow inputs to the input number boxes and the workflow output (result) to the output number box.
- System > Name:Button-1
- Appearance > Text: Calculate
- Behaviour > Button type: Other
- Behaviour > Type: Workflow
- Behaviour > Category: The category you assigned the workflow to.
- Behaviour > On Click: The workflow name; for example, Adding2Numbers.
- Behaviour >Input Parameter > WfInput1 > Input Control: Num1
- Behaviour >Input Parameter > WfInput2 > Input Control: Num2
- Behaviour >Output Parameter > Output Control > MyResult: Num3
The screenshot below illustrates the Behaviour properties of the button.
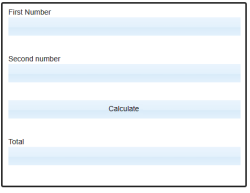
After configuring the controls, the page should now look like this:
In the page designer, click Save page.
Testing
In the page designer, click Design preview. A new browser tab opens where you can test the web application.


